Hi!
My name is Benita Skinner, and I design Victoriana
Quilt Designs quilt patterns.
It's been a lot of fun putting this Handwork
~ While You Wait Week together.
I've always
been a big promoter of the relaxing qualities of handwork,
whatever your favourite is, and the tutorials this week
were meant to get you started or re-inspire you.
From the comments in the emails I've received and on
my Facebook
wall, I know we are all kindred spirits who love
handwork!
My tutorial
is for a handwork take along bag to keep your work &
tools/accessories in. Make it in a favourite print that
you love!
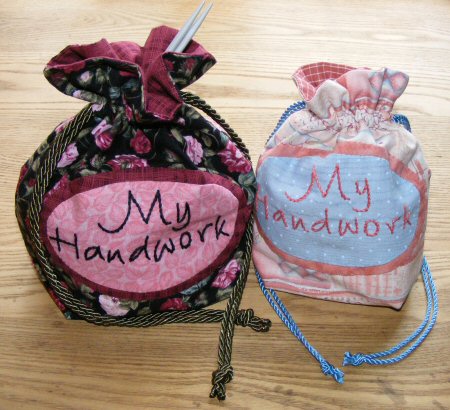
I've included the measurements for two sizes, but you
can widen and lengthen the dimensions to make a much
larger bag.
Also included are the templates and pattern for the
'My Handwork' label you can embroider for your bag.
Request
the free My Handwork Embroidered Label Templates here
Finished
Sizes: Smaller bag 6" x 8" [Larger bag 8"
x 10"]
Both Fat Quarter Friendly!

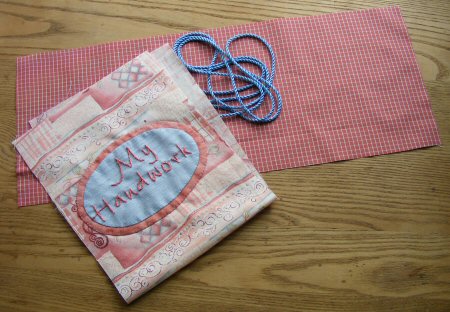
*Bag
and Matching Liner Fabric 6½" x 16½"
[8½" x 20½"]
*Label Fabric 3½" x 5½"
*Label Frame Fabric 4" x 6"
*Matching Cord 2 ~ 15" lengths
*Matching Embroidery Floss
1.
Applique the 'My Handwork' label to the bag fabric,
approximately 2¾" [4"] from the top
edge, as seen in the picture above.
2.
Place the bag and liner fabric right-sides together
and stitch the top and bottom edges with a ½"
seam allowance.
Press the seams open.
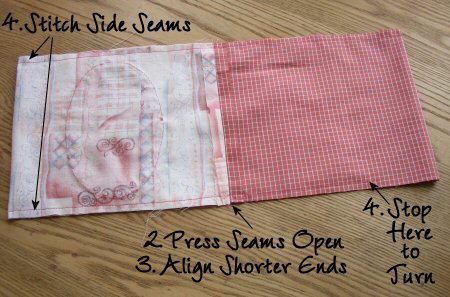
3.
Pull the fabrics apart and re-align the two sewn seams
together, lining up the long edges, as seen in the picture
above.
4.
Stitch the side seams with a ¼" seam allowance.
Stop about 3" from the end on the liner side, along
one of the side seams, so you have an opening to turn
the fabric.
5.
Turn the fabrics right-side out, being sure to poke
out the corners. Stitch the opening closed.
6.
Place the liner fabric into the bag fabric matching
up the corners within the bag. Press the top fold.
7.
Turn the bag so the liner is on the outside, and reposition
so the side seams and bottom fold align, giving you
two points (see below).
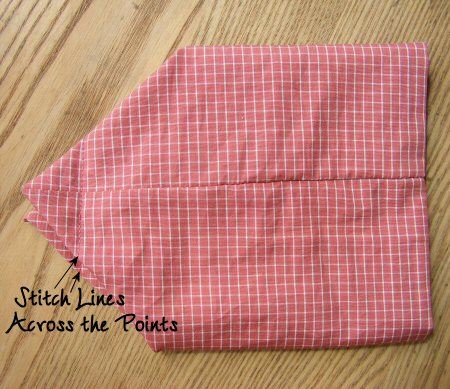
Measure
1" [1¾"] from the corner points and
stitch a line across both sides. This will form a gusset
to allow your bag to sit flat.
8.
Turn your bag right-side out and stitch two lines 1"
and 1½" from the top edge [1¼"
and 1¾"] (see picture below), through both
layers of fabric.
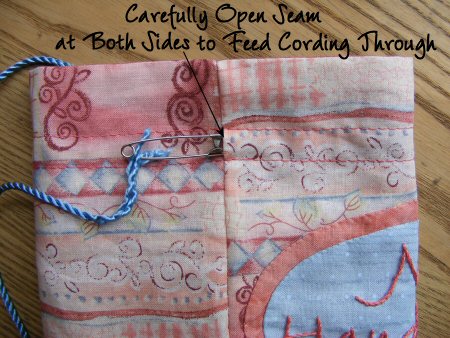
9.
Unsew a few stitches along both of the side seams of
the bag fabric, making an opening.
Feed one of the cords through, bringing it back out
the same opening. Repeat for the second cord on the
other side seam. Knot the ends of the cording together
and trim.
Design
Tip: Make your take along accessories in matching fabric!
~~~
I
want to give a big Thank You to all the wonderful creative
guest posters this week and their inspiring tutorials!
I hope you enjoyed meeting them.
And Thank You for sharing the While You Wait Week, with
us!
Stay Tuned...More to Come :)
I invite
you to visit my site here,
and request all of the complimentary quilt patterns,
calculator charts, printable quilty bookmarks and graph
paper. There is much for you to enjoy and explore!