|
|
|
| Collecting fabric for future quilts is something many of us do. We see a fabric, fall in love with how it looks and instantly get ideas on how we can use it...Nothing harmful there! I
personally collect in colours, or themes with a future quilt in mind.
I find the most useful addition to my fabric stash are basic tone-on-tone fabrics in all the colours I can find. These replaced solid fabrics for me in quilts many years ago. In
general I only collect a half yard of each. ~~~ My video version, of what I cover below.
Quilt Fabric Organizing & Storage ~~~ Storing
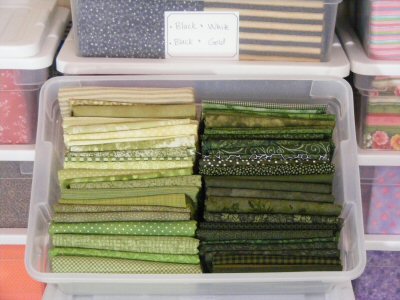
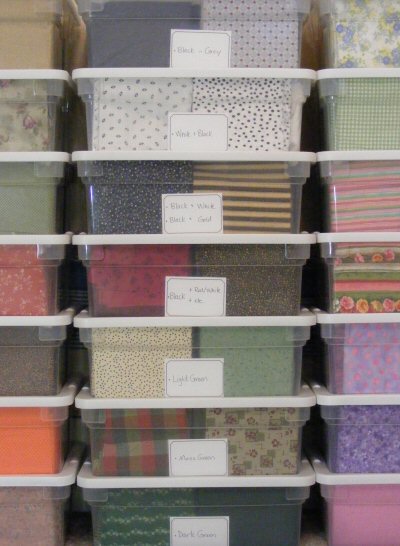
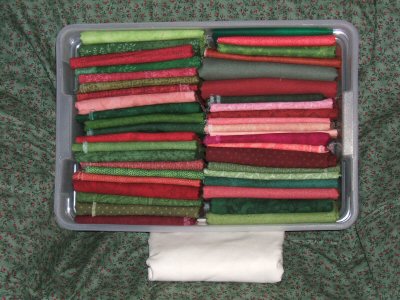
fabric is a very personal thing. I converted my collection of fabric into clear stackable plastic containers from many cardboard boxes, a few years ago, to prepare for my off grid move. Though I’ve always stored my fabrics by general colours (green, blue, etc.) and upcoming designs I’m collecting for, I also took the opportunity to sort the colours further into common like ‘families’ of fabrics (moss green, dark green, light greens, green-blue, etc.), which makes it even easier to find the fabrics I need. The investment in these 16.1" x 11.1" x 5.9" (40.9cm x 28.2cm x 15.0cm) containers has been such a treat to myself and I love my new fabric stash storage system. As a special note: All my new fabrics are washed before they get added to the collection. There are good reasons for this (dye running & shrinkage), but I mostly do it for removal of the chemicals fabric companies use. I don’t want to risk my health. When you press unwashed fabric the steam travels the chemicals into your breathing zone. Please be careful…I learnt about this from a fellow quilter who got very ill for this reason. The folding of the fabric into relatively uniform size is important, but since I am not stacking them, they can vary in width and thickness, so I am able to store all yardage up to 2 yards in these containers, by folding them into approximately 6" wide by 5½" high. [Fabric nicely folds into these measurements, and I would recommend finding containers that fit this folded size, if possible.] I do not press my fabrics until I’m using them, so there is no need to keep yardage large and flat. Here’s how I fold the various sized fabrics… For yardage that has both selvages: Fold
the fabric selvage to selvage.
Fold
the fabric raw-edge to selvage. This makes it about 11" wide.
Fold
into approximately 6" wide by 5½" high.
This method allows me to see the fabrics quite well. The folds show a portion of the design, as the edge of bolts in fabric stores shows enough to make us curious. Note about my smallest scraps: I keep these in several different sized baskets, including one for under an inch scraps and threads, which I keep to fill pet pillows. If you make a lot of scrap quilts you can cut your smaller scraps into squares, bricks or strips, that you will use for a scrappy quilt you wish to make. I label each container with the names of colours that are contained within, and this label helps me further decide if a container could have what I’m looking for. So now, instead of forever moving and opening boxes in my hunt for a fabric, I find the stack the fabric would be in, take out the container(s) that most likely have what I’m looking for and even before I open the lid I can scan the clear bottom and sides.
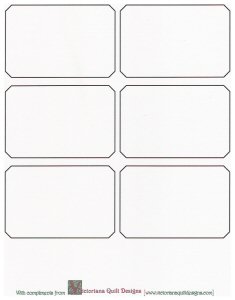
I made up my labels into a pdf file that you request, hoping it will be as useful to you in your fabric storage system.
Request these free Printable Fabric Storage Labels
As the fabrics arrived from the fabric companies that sponsored the Fabric Party I collected them in one of my buckets and they already look great together!
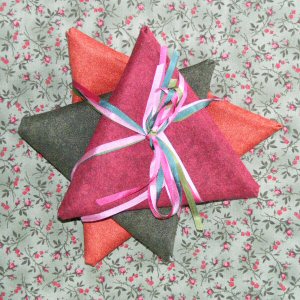
~~~ A fat quarter is a quarter yard (or metre) of fabric (18" x 22") made by cutting a half-yard of fabric in half.
Choose
three fat quarters in fabrics that look nice together, to make up your
star. Request a free Printable Fat Quarter Stars how-to ~~~
|
|
|
Content & Graphics © 2001~ Victoriana Quilt Designs All rights reserved. Unauthorized use is strictly prohibited. Welcome | Victoriana Quilters | Block of the Month | Pattern Page | Library | Membership Schoolhouse | Gallery | Sharing | Feedback & Links | Card Shoppe
|