My name
is Allison and I blog at little
lovelies.

I
am a wife and full time working mom, and I love to create
in my spare time. It's my "me" time and it
brings me a bit of peace in my otherwise hectic life.
I have been blogging for about a year, but creating
things for as long as I can remember. Isn't that the
story with most of us crafty folk?
I
have many hobbies - embroidery,
cross
stitch, card
making, and knitting.
Knitting is one of my favorite "take and go"
crafts, so I thought it would be fun to have a pretty
knitting bag to tote around my projects in.
After
all the chatter, let's get to the project, shall we?

My new knitting
bag. My yarn embroidered knitting bag. I am
pretty excited about this one.
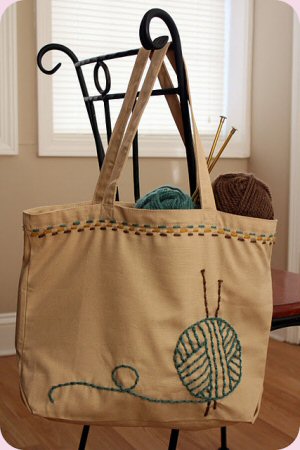

To make it, you only need a few inexpensive things:

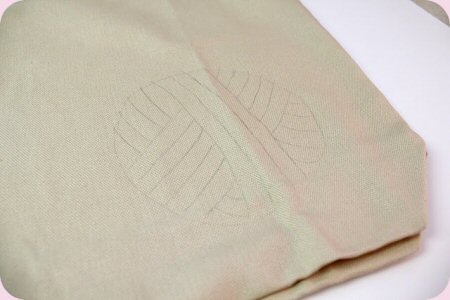
I started
by tracing a circle (for the ball of yarn) onto my bag
with a pencil. You could free hand a drawing of course,
but I can't draw a circle without drawing an oval instead.

After
I traced the circle, I just kind of filled in with the
yarn lines. I didn't use a pattern and just added in
lines here and there. You will want to make sure you
don't draw an intricate or closely spaced design since
the yarn is so thick and not great for detail.
After
I had my "pattern" drawn, I stitched it using
a back stitch. You will want to use short lengths of
yarn (about 12 inches) because the yarn gets fuzzy as
it passes back and forth through the canvas. If you
use a piece much bigger than 12 inches, it gets way
too fuzzy and doesn't look so great.

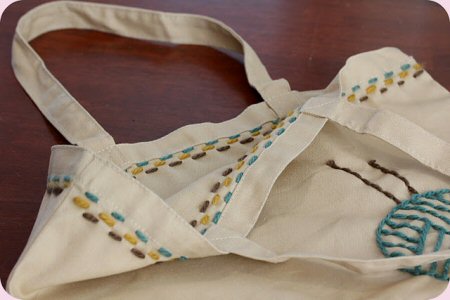
I
also added 3 simple lines of running stitch at the top
border of the bag.
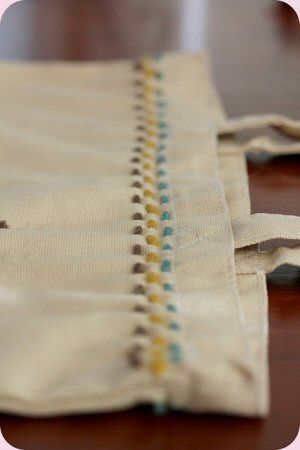
My
favorite part is that you can see the running stitches
inside the bag. Sweet.
It
is already filled up with a knitting project and tools
of the trade, ready to go.
I would love for you to stop by little
lovelies and visit.
Happy
knitting!

~~~
Thanks
Allison...I love how you used yarn for the embroidery
of this design!
Be sure
to visit Allison's site here.

