Hi
Everyone, my name is Annie, and I’m a mad passionate
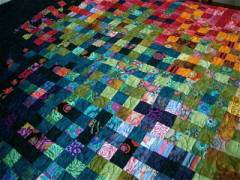
Gardener, and I love to make quilts. I’m also prone
to a little bit of “hooky”. I have a few addictions,
which could be worse, and they are FABRIC, PLANTS and
YARN.
I’m the type of ‘gal’ that has trouble sitting quietly
doing nothing. My husband often bemoans “can’t you just
sit and watch TV?” I can’t you know, I need to be doing
something, keeping my hands busy, creating, making progress,
you know how it is.
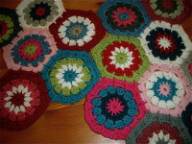
Lately I’ve been spending a bit of time on Ravelry,
looking at crotchet patterns, then printing them, then
buying yarn, and then a few DVD’s later, coming up with
some wonderful creations.
Crotchet is a great “car craft” when you’re not driving
of course, and something you can easily take with you
to appointments, Weight Watchers Meetings, Aunty Susan’s
and just about anywhere – except work, although I have
been known to take my crotchet projects to work on stressful
days, just so I can stroke it in my down times.
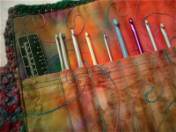
My Ready Threader Tutorial is another great little project
that would be a handy one to carry with you. They are
easy, quick and fun to make, and also make lovely gifts
for crafty friends.
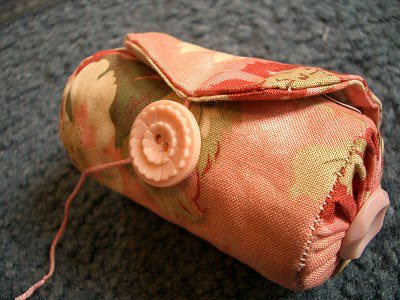
This Ready
Threader Tutorial is not my own invention, but a great
little idea, and quick to make. A good gift for a crafty
friend or a nice accessory for yourself. Some have even
told me you could carry your lipstick in it, in your
hand bag, or even a couple of "white mice."

*Some light card for templates
*Small amount of fabric from your scap basket
*Small piece of wadding
*Tiny bit of felt
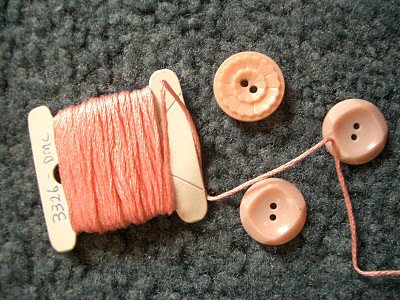
*3 buttons
*Some embroidery thread
. . . and
you're ready to go!
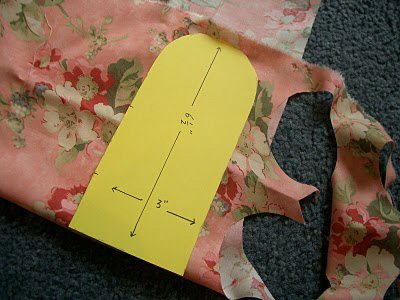
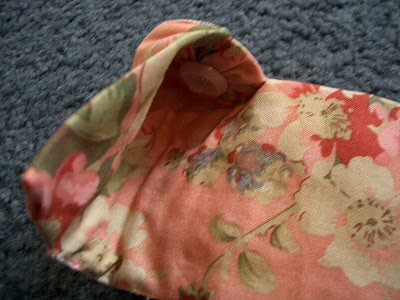
1. Cut from light cardboard the templates as shown below.
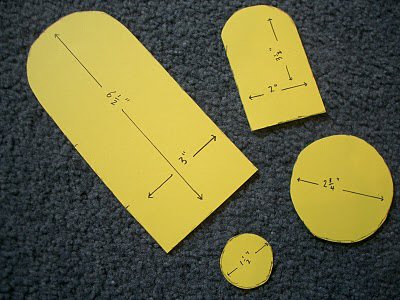
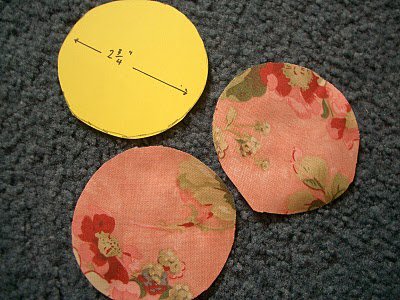
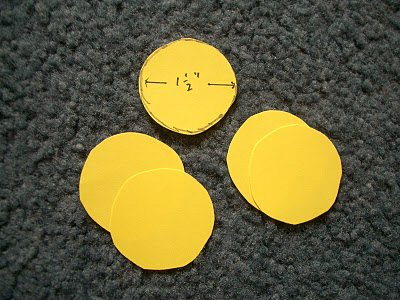
2. From
the 2¾ inch circle template, cut 2 circles of
your chosen fabric.
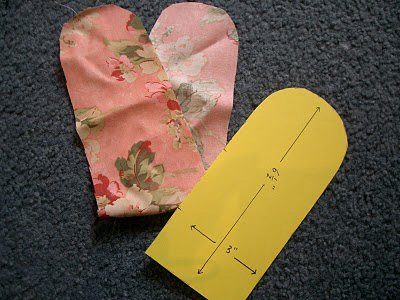
3. With
the fabric on the fold, cut one of the 6½ inch
by 3½ inch shapes.
Tip:
For extra body, also cut one of these shapes from some
wadding (batting) fabric that you just happen to have
lying about in a box. I trim the wadding a bit thinner
so that it fits snuggly inside and you don't need to
cut the wadding on the fold.
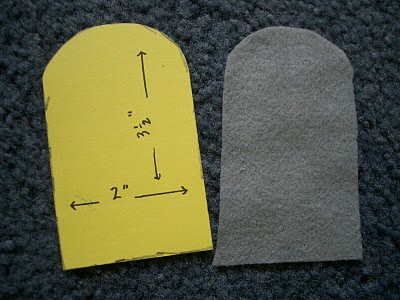
4. From
the smallest circle template, cut 4 extra pieces from
the light card. These will go inside the yo-yo's for
extra strength.
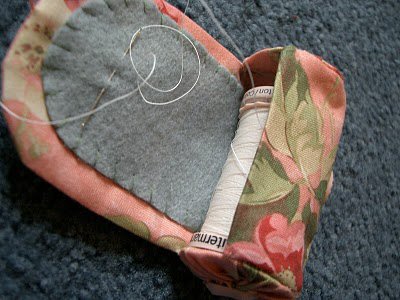
5. You will
need to cut one shape out of felt, not on the fold this
time.
6. Choose
some buttons and some thread.
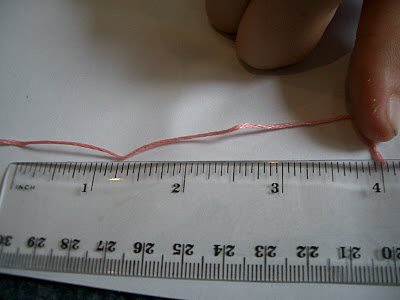
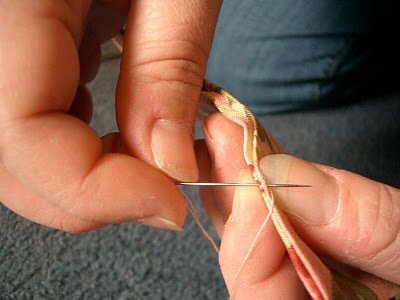
7. Measure
4 inches of thread and knot at each end.
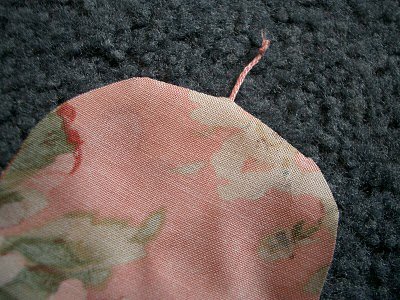
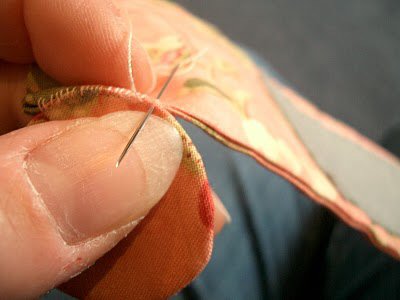
8. Lay the
thread on the right sides of the fabric with a little
bit poking out the end and sew around the large shape,
leaving a couple of inches for turning.

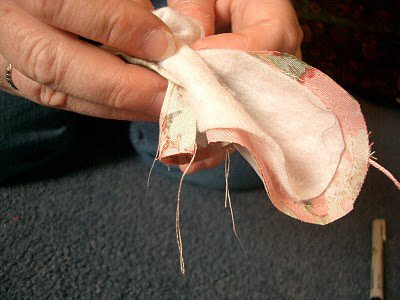
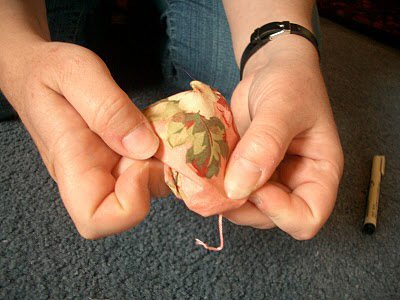
9. Lay your
wadding over the top of one side, and turn the main
shape inside out, which will then be the right side
out.
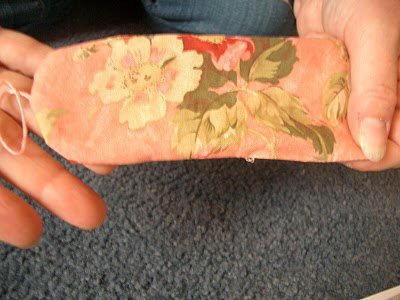
10. Now
you have your wadding on the inside, and you will need
to hand sew the little gap that you left for turning.
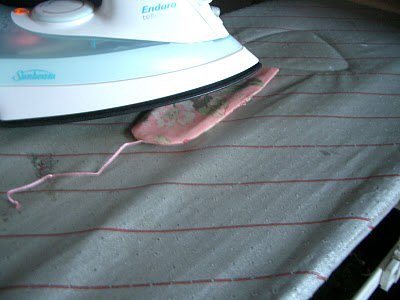
11. Press
your main shape.
12. Now
make your yo-yo's and insert the 2 little pieces of
card into each of them.
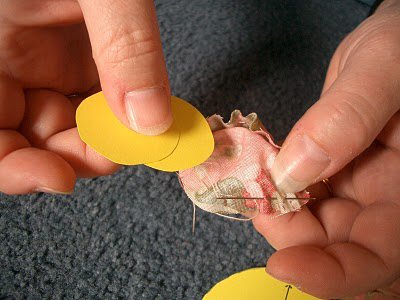
13. I left
the long thread of the yo-yo for later stitching of
the threader.

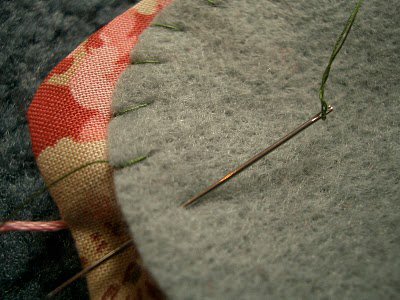
14. Now
lay your felt over one side of the main piece and blanket
stitch to that piece.
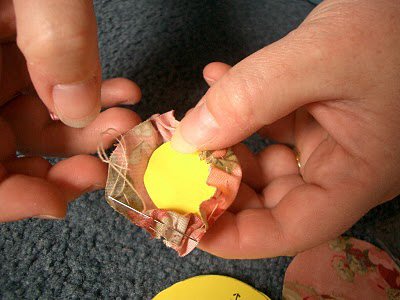
15. Now
with your yo-yo's facing inside, sew them to the edge
of your main fabric.
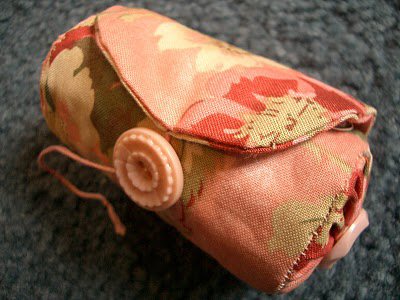
16. Once
both yo-yo's are sewn on, turn the ready threader so
that the buttons face outwards.

17. Now
put your cotton in place, and slide your needle into
the felt, and you are finished!
Enjoy the week of handy tips for Handwork – While you
wait.
Cheers,
Annie
~~~
Thanks
for sharing your Ready Threader tutorial with us, Annie.
I really love your thread holder and hope to make one
for myself!
Be sure
to visit Annie's site here.